Friday 27 February 2015

How I Edit My Blog Photos


One of the tasks on my 30 Before 30 list was to take photos manually on an SLR camera and then edit them myself.  I made this list as I was itching to get into blogging, so the concept of editing photos was so foreign to me.  Knowing that I wanted to start my own blog, I was under the assumption that in order to do so one must have the best equipment - mainly an SLR camera, a MacBook and either Lightroom or Photoshop for editing photos.  Brian already has an SLR camera, and I had just gotten my Mac so as soon as I downloaded Lightroom for myself I figured that I was ready to make my entrance into the blogging world!  I've learned a lot since starting La Petite Noob and, while I appreciate all of my equipment, I've come to realize that it is certainly not required material to start blogging.

Nowadays I find myself editing photos almost every other day and, while I'm not an expert, I've definitely developed a rhythm and practice that works best for me and my blog.  I'm happy to share some of my best tips and tricks, resources and things I've learned along the way.

Use Presets

I edit my blog photos using Lightroom and am not ashamed to say that I use a variety of presets to help get the job done.  Why not?  Presets are the gateway into editing professional looking blog photos, and there are so many to chose from that you're bound to find some that are suited to your taste.  For example, when I first started blogging I preferred to use a matte, slightly vintage preset on all of my photos.  I've since evolved past a heavily-filtered photo, and now use a series of work-flow presets that help me to quickly adjust the lighting, colour and sharpness to achieve a more clean and natural look.  Some of my favourite Presets are from Pretty Presets and Bellevue Avenue.  Keep an eye out for coupon codes, as both sites offer frequent discounts.

Utilize Free Photo-Editing Pages


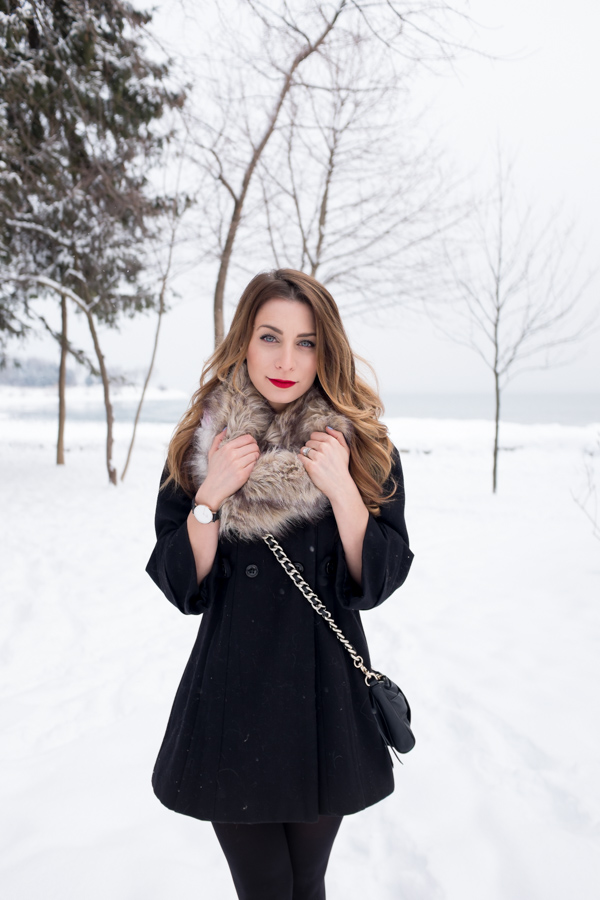
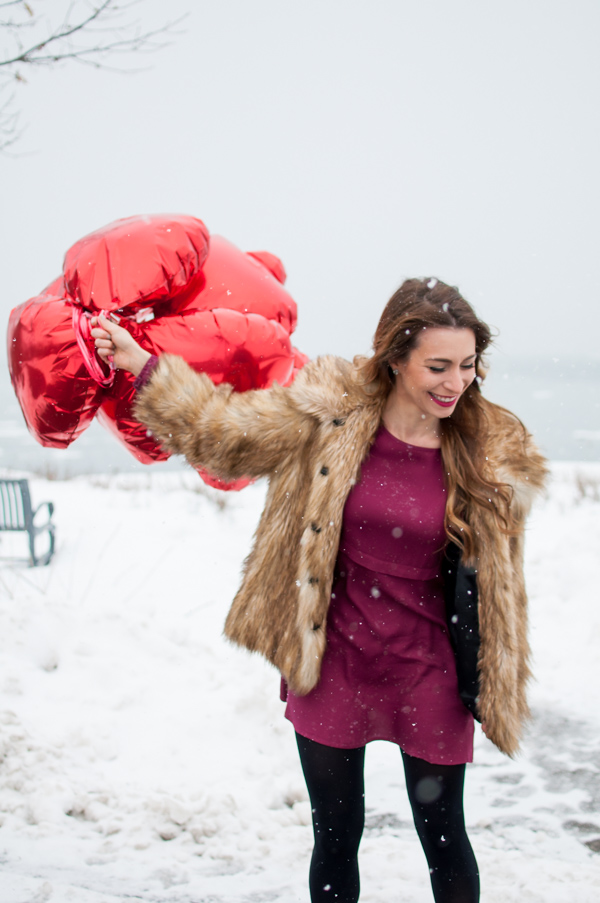
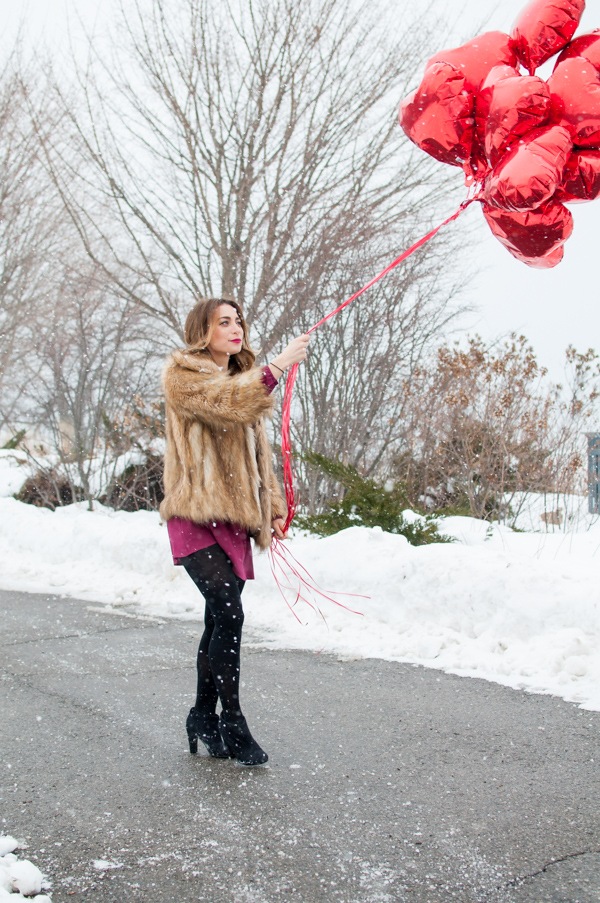
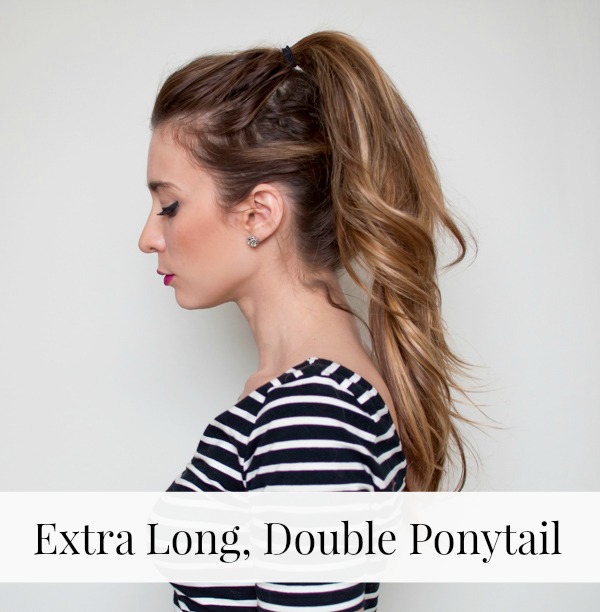
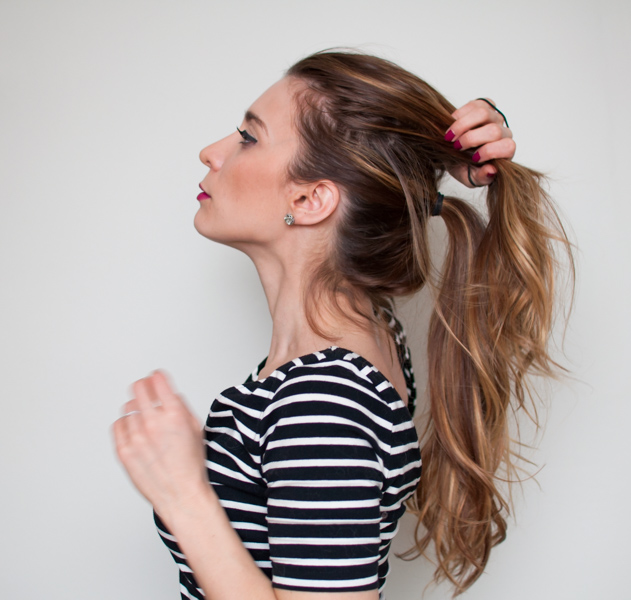
If I'm every doing a hair tutorial, or need to place text onto a photo I will most often than not turn to a free photo-editing site to help to complete the task.  Picmonkey is my absolute favourite site for manipulating photos after they've already been edited in Lightroom - and best of all, it's free!  I would even go as far as to say that you could really use Picmonkey as your main blog photo editing tool as well.  This editing system is incredibly powerful, and extremely user-friendly.  I created the collage above using this free photo editing site. There is an option to upgrade to a paid membership that allows you access to more features, but in my opinion it is not necessary.

Take Advantage of Online Resources

There are so many talented bloggers out there that write wonderfully helpful posts on blog photography and editing photos.  Some of my favourites that I like to keep on top of are the ladies at A Beautiful Mess, and my girl Dana with Wonderforest - these girls really know their stuff, and have a way of explaining blog photography and photo editing in a very relatable way.  Check them out!

Take Photos in Natural Daylight


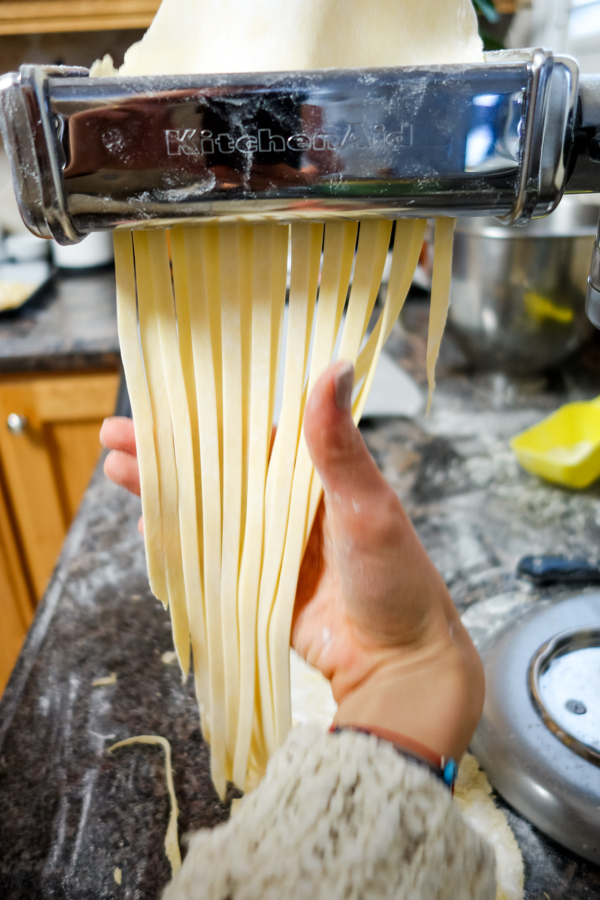
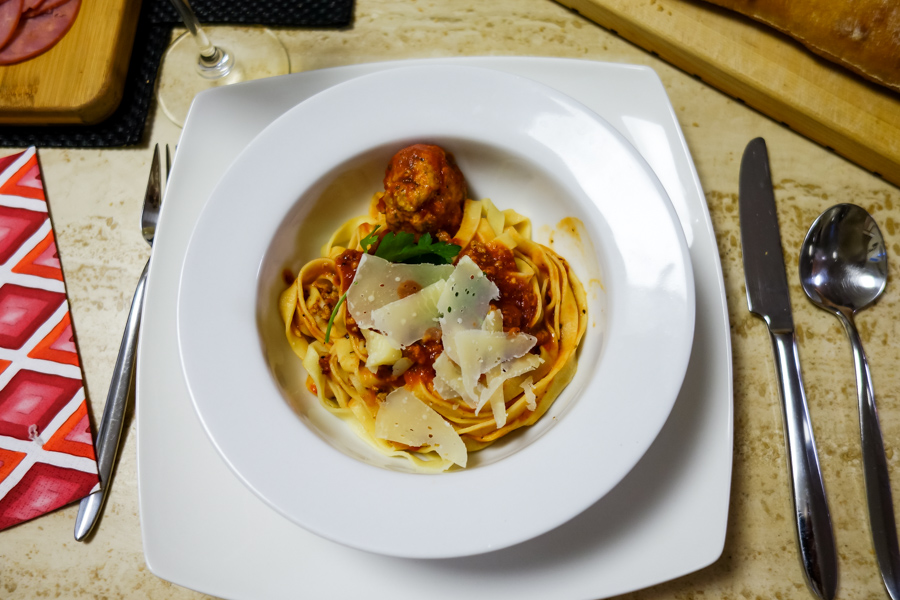
I had mentioned this in my Tips for Instagram Photos post, but the same applies for blog photos - Utilize natural light and take your photos in it!  Editing photos that have been taken in natural light is much more satisfying, as you get a much sharper result and have to manipulate the photo less to achieve great colours.  Be careful to not shoot in direct sunlight through, then your photos are full of shadows and washed out - no amount of editing can overcome that and still look natural.  Natural daylight in a spot where the sun doesn't hit directly is your best friend when shooting and editing blog photos.

Have No Shame


This is less of a photo-editing, more of a photo-taking tip but I swear that the quality of my photos increased tenfold after I stepped out of my comfort zone and starting photos in different locations - where people can potentially see you!  The thought of someone seeing me as I took photos had previously terrified me, and it really held me back.  Now I've lost all shame and ignore the sometimes confused looks from passerbys that I get.  Different locations also make editing a lot more fun, and less tedious - a win!

Editing blog photos seems like such a huge task to overcome at first, but once you find what works best for you it becomes second nature!  What are your blog photo editing habits?  I would love to know!

xo Joëlle


Share:

Monday 23 February 2015

OOTD - Winter Chic with Faux-Fur


As with most Canadians, I think that I'm pretty much over Winter at this point.  This weekend we in Toronto were hit hard with a wicked snowstorm that took possession of our fair city.  The snowfall was unreal and didn't stop until early Sunday morning, leaving behind a surprisingly beautiful and serene Winter wonderland.  Not one to waste the day (or a photo opportunity), I popped on my favourite faux fur snood overtop of a classic bell-shaped wool coat and was ready to face the outdoors!  Read on for additional photos and outfit details.


Share:

Friday 20 February 2015

OOTD - Winter Parka Casual Style


To say that the weather in Toronto has been cold would be an understatement.  With a bone-chilling wind, and temperatures dipping into the -40s I think that everyone in this part of the country is in survival mode.  As much as I am constantly trying to find a cold-weather alternative, sometimes a girl's just got to wear a parka.  Granted, I am a little more deconstructed than normal for these photos (no mittens, open jacket etc.) but I'm a firm believer of sacrifice for blog photos.  What would be the fun if everything was easy?  Read on for complete outfit details and more photos.


Share:

Tuesday 17 February 2015

OOTD - Valentine's Day Faux Fur


I hope that everyone had a fantastic Valentines Day weekend!  Even though I had a great weekend, it was not without it's tribulations - it's been COLD here in Toronto!  I'm talking -40 degrees Celsius cold, which is no joke.  We were still able to be out and about this long weekend, but it just meant making the extra effort to stay warm.  This outfit in particular is what I wore for Valentines Day, after it being altered slightly for the extreme temperatures.  For example instead of sheer hose, pumps and a light jacket I opted for heavy tights, booties and faux fur.  Mother Nature was not going to  stop me from my plans - or from an impromptu photo shoot with an oxblood dress and  fun heart-shaped balloons!

Vintage Faux-Fur Coat - Asos, Dress - Aritzia

If you follow me on Instagram, you would have seen some snaps from my Valentines Day adventures.  We started off the day with brunch at the incredible Cluny in the distillery district in Toronto.  I really enjoyed my eggs Benedict, and even treated myself to a pre-noon cocktail - because  why not!  After a few lattes with friends at my favourite coffee bar in the city, Dineen Coffee Company, we moseyed over to the Art Gallery of Ontario to check out the new Jean-Michele Basquiat exhibit - incredible.  Finally we ended the day binge watching my new favourite show 'The Wire.'  All in all, I couldn't have asked for a better day and have gone from a Valentines Day hater to secretly wishing that everyday was Love Day!


How was your Valentines Day?  Let me know!

xo Joëlle
Share:

Friday 13 February 2015

OOTD - Winter Office Wear

office work wear for winter outfit

I've never actually shared this with you guys but within the last few months I took a step back from my pevious job and have settled into more of a desk job in an office environment, with regular hours.  The professional change came with a total change in work wear, as in I had to figure out how to dress for business - without spending too much money on a whole new wardrobe.  Now that I've settled into the new work environment, I've developed a uniform of sorts - a typical oufit of mix-and-match separates that work for a 9 to 5 day, and can transition easily into my everyday life.  This outfit is a typical day at the office for me that is not only work-appropriate, but also holds up to the chilly winter temperatures I have to battle with my commute to-and-from the city.  Read on for additional photos and outfit details.

Share:

Thursday 12 February 2015

30 Before 30 - I Made Fresh Pasta


Well Noobs, my 30 before 30 list had taken a bit of a backseat recently in favour of personal style and  tutorials - but I'm back on track and have another task to check off.  This past weekend, I had a chance to spend the day with my lovely mother and together we made fresh, homemade pasta completely from scratch!


My mother is a trained chef, and always creates some of the best food I've ever tasted - I'm serious, I've traveled the world and I have yet to taste a dish better than something my mom will whip up for a regular Sunday dinner.  She assured me that making fresh pasta was easy, and I was reluctant to believe her.  Once we got started into the pasta making process, she was right - fresh pasta is pretty simple to make, especially if you have a stand mixer and the right attachments.  Creating pasta from scratch is time consuming though, a far cry from my usual kitchen habits of turning pretty much anything into a stir fry in less than 15 minutes.


I have to say that the extra time and effort in the kitchen was completely worth it.  Our pasta tasted incredible, and the dining experience was made even sweeter knowing that I had a hand in creating it.  Another testament to the fact that you always get what you put into things.  I would like to start slowing things down a bit and start to take pleasure in cooking, instead of just quickly throwing something together for a quick meal - it really is satisfying.  On top of everything, I just had a great time making fresh pasta with my mom.  It's safe to say that this venture has gotten me re-motived to tackle the rest of my 30 before 30 list and I can't wait to see where the next task takes me.

xoxo Joëlle
Share:

Monday 9 February 2015

OOTD - Black Maxi Skirt for Winter


I have one word to sum up my weekend: Snow.  That's right, Mother Nature decided that we were having a bit too easy of a Winter in Toronto and she remedied that by dumping a mountain of snow on us.  Most of my plans for the weekend were canceled, but I still managed to get out and about to run some errands and I did so in a maxi skirt.  I know that maxi skirts and dresses are normally associated with Spring and Summer looks, but I enjoy a good maxi skirt in the Winter as well.  This weekend in particular, I really enjoyed the juxtaposition of a monochromatic black maxi skirt and sweater against a Winter wonderland background.  Read on to see how I styled a long skirt for the Winter time.


Share:

Friday 6 February 2015

OOTD - Grey Pea Coat + Plaid Blanket Scarf


Who else is as tired of winter parkas as I am?  Speaking from someone who lives in a part of the world where the temperature plunges into the minus double-digits (Celsius), sometimes style just has to take a back seat while survival mode steps in.  Thank goodness for wool pea coats for offering some sort of alternative.  Layered with a comfy blanket scarf and some fleece-lined tights, the wool pea coat is a great option for looking smart and staying warm in the winter time.  Read on for additional photos and outfit details.


Share:

Wednesday 4 February 2015

Easy Extra-Long Ponytail Hair Tutorial


I've been doing a lot of hair tutorials lately, haven't I?  Truth be told, I lose all motivation to put any effort into my hair during the winter time so I rely on quick and easy hairstyles to get me through.  Why not share them?  Today's tutorial is how to achieve this very quick, very easy extra long ponytail - naturally, without the use of extensions.  How amazing is that?  Check out how you can get this super-simple hair style for yourself.


As per usual, I'm starting off with some big messy hair.  I find that most hair looks work best with second or third-day hair that has a bit of texture to it.  If my hair is looking a little flat, I like to spray in some dry shampoo to my roots for an extra lift and added texture.


Start by separating your hair into two separate sections.  Clip the top section of your hair to keep it out of the way for the time being.


Gather the bottom half of your hair that's loose and tie it all into a tight ponytail, making sure that it sits slightly higher than the middle of your head.


Once you're happy with your first ponytail, release the second half of your hair that's been clipped to the top of your head.


Gather all of the loose hair at the top of your head, and tie it all into another ponytail - making sure that it rests directly on top of the first ponytail.


At this point, I like to give the top ponytail a bit of a tease at the roots.  By backcombing the top ponytail, it helps to conceal that there is another ponytail right underneath it.


And that's it! A super simple, extra long ponytail that takes minutes to do.  People will think that you hair has magically grown overnight!  I always get questions about my sudden boost in hair lenth when I wear this style.  Try it out, and let me know how it goes!

xo Joëlle
Share:

Monday 2 February 2015

OOTD - Vintage Faux Fur for Winter


How was your weekend?  I had a great weekend full of family and friends, and managed to be out and about for the majority of the weekend - despite the frigid temperatures.  Toronto is under another deep-freeze, with the addition of snow and overcast.  My first instinct with winter weather is to hibernate indoors in some PJs and, while I did do this for some of my weekend, I did brave the cold weather with the help of this Asos Vintage Faux Fur Coat.  I've mentioned how soft and luxurious this jacket feels in this post, and it lends the perfect vintage feel to any outfit while helping to stay warm and cozy.  Read on for additional photos and all outfit details.


Share:
© La Petite Noob | A Toronto-Based Fashion and Lifestyle Blog. | All rights reserved.
Blog Layout Created by pipdig